
How to Check Distance and Radius on Google Maps For your Vivo X Fold 2 | Dr.fone
How to Check Distance and Radius on Google Maps For your Vivo X Fold 2
“Is it possible to use Google Maps to calculate distance between multiple locations? I want to know the exact distance between different spots, but can’t seem to find any solution!”
If you also wish to use the distance marker on Google Maps, then you might have a similar query like this. Apart from navigation, Google Maps can be used for different other applications as well. For instance, you can easily measure distance between two addresses on Google Maps. Besides that, you can also use the Google Maps distance radius feature to focus on a certain area. In this guide, I will let you know how to use Google location distance and radius features in detail.


Part 1: Draw a Radius Circle on Google Maps
You might already know that Google Maps provides a map of the entire world for us to navigate. Though, there are times when users like to draw a radius on Google Maps for a particular location. Presently, the native feature of Google Maps does not have a distance radius tool. Therefore, to draw a radius on Google Maps, you would have to use an application that has its own interface. One of them is Map Developers that is based on Google Maps and has simply provided a solution to draw a radius on the map.
- Firstly, just go to the official website of Map Developers circle tool on any supported browser like Google Chrome. You can see that the website is based on Google Maps with its added layers to draw a radius on the map.

- Now, just use the native feature of the map to zoom in to any location of your choice. You can also enter the name of the location that you are looking for in the search bar.
- Besides that, you can also enter details about the radius of the circle, its color, and so on. After entering all the needed details, click on the “New Circle” button and it will be reflected on Google Maps interface.

If you want, you can later delete this circle or draw multiple circles in different colors to mark them in any location of your choice.

Part 2: Determine the Distance with Radius on Google Maps
Apart from drawing a circle or radius on Google Maps, a lot of people would like to specify its distance as well. For instance, you might wish to specify a radius of specific miles or kilometers for a place on Google Maps. As stated above, the native feature of Google Maps is presently missing the distance radius feature. The good news is that there are tons of websites out there that have presented the same feature on the original layer of Google Maps.
- Map Developers Radius
Consider the example of the circle tool of Map Developers that we have discussed above. In this, you can just enter the name of a specific place on Google Maps. Now, you can specify the distance of radius in miles or kilometers. This will automatically draw the specific distance radius on Google Maps for the designated location.

- KML Circle Generator
If you know the exact longitude and latitude of the place, then you can also take the assistance of KML Circle Generator. In this, you would have to specify the exact coordinates of the place and the Google Maps distance radius value. After entering the relevant details, you can proceed and draw the radius distance on Google Maps.

 KoolReport Pro is an advanced solution for creating data reports and dashboards in PHP. Equipped with all extended packages , KoolReport Pro is able to connect to various datasources, perform advanced data analysis, construct stunning charts and graphs and export your beautiful work to PDF, Excel, JPG or other formats. Plus, it includes powerful built-in reports such as pivot report and drill-down report which will save your time in building ones.
 It will help you to write dynamic data reports easily, to construct intuitive dashboards or to build a whole business intelligence cockpit.
KoolReport Pro package goes with Full Source Code, Royal Free, ONE (1) Year Priority Support, ONE (1) Year Free Upgrade and 30-Days Money Back Guarantee.
Developer License allows Single Developer to create Unlimited Reports, deploy on Unlimited Servers and able deliver the work to Unlimited Clients.
Part 3: Determine the Distance between two Addresses on Google Maps
This is one of the most resourceful features of Google Maps that a lot of people are not aware of. Using its native interface, you can find a straight line distance on Google Maps. That is, it won’t be the driving distance, but the exact distance between 2 places on Google Maps. If you want, you can add other spots to let Google Maps calculate distance between multiple locations as well. To learn how to measure distance between two addresses on Google Maps, follow these steps:
- At first, just launch Google Maps on your system and go to the source location on it. You can click on any marked location or anywhere else on the map. Even if you click on any unmarked location, Google will load its coordinates for you.

- Now, once the source location is identified, you need to right-click it to get its context menu. From the available options on the context menu, click on “Measure Distance”.

- Afterward, just click anywhere else on the map and it will automatically find a straight line distance in Google Maps between these two spots.
 vMix HD - Software based live production. vMix HD includes everything in vMix Basic HD plus 1000 inputs, Video List, 4 Overlay Channels, and 1 vMix Call
- If you want to continue, then just click anywhere else on the map and that will be considered as the next spot. Therefore, you can just click as many times as you want to let Google Maps calculate distance between multiple locations.

This technique will let you measure distance between any addresses on Google Maps. It doesn’t matter if it is your present location or not. If you want to measure distance in some other location, then just enter its name in the search bar to load it. In this way, you can measure distance anywhere in the world by sitting in your home.
This brings us to the end of this extensive guide on using Google Maps distance and radius features. As you can see, I have provided a smart and user-friendly solution to draw radius distance on Google Maps. Besides that, you can also follow the above guide to measure distance between two addresses on Google Maps. In the same way, you can also let Google Maps calculate distance between multiple locations as well. Go ahead and try these Google Maps distance and radius hacks and share your experience with us in the comments below.
Dr.Fone - Virtual Location
1-Click Location Changer for both iOS and Android
- Teleport from one location to another across the world from the comfort of your home.
- With just a few selections on your computer, you can make members of your circle believe you’re anywhere you want.
- Stimulate and imitate movement and set the speed and stops you take along the way.
- Compatible with both iOS and Android systems.
- Work with location-based apps, like Pokemon Go , Snapchat , Instagram , Facebook , etc.
3981454 people have downloaded it
You Might Also Like
Location-based apps
GPS spoof for dating apps
GPS spoof for social apps
Pokemon Go on PC
AR game tricks

Change Phone GPS Location Easily
- ● Teleport GPS location to anywhere
- ● Play AR games without moving
- ● Spoof Location on the popular Apps
How to Intercept Text Messages on Vivo X Fold 2
With the increase in the use of smartphones nowadays, the applications for smartphones have gone on to become equally smarter. For instance, text messages which are one of the most important components of every phone, can now be easily intercepted or spied on, courtesy some smart applications. Yes, it is a matter of minutes now to be able to spy on or intercept text messages even when not having the target device in your possession. Moreover, there are applications that work on all platforms whether it is android or iOS. But how do you intercept text messages? Well, if this is what’s playing in your mind; you are absolutely at the right place. In this article, we are going to discuss ways to intercept text messages from both iOS and Android Phones and how to know whether your text messages have been intercepted.
- Recommended android/ios location faker tool: Virtual Location - the most trustworthy way to fake GPS on iPhone /Android device .


Part 1: How to know whether your text message has been intercepted?
Intercepting a target phone could give us the controls and allow us to spy on various activities happening on the target phone even to the extent of giving us information about what’s happening in the surrounding. It does this by listening to the conversation by turning on the microphone even when the target phone is not in use. So, while the spying application keeps running in the background silently, text messages can be easily intercepted. So, it is imperative to know and read the signs to actually get to know if your text messages are being intercepted. There are some signs which could give you an idea if your text message has been intercepted.
Odd Phone Behavior – If your phone is behaving erratic and lights up suddenly even when not in use, it is possible that the cell phone is being intercepted. Some other signs could be random beeping noise, phone shutting down by itself, etc. While this might happen normally at times, if it is happening on a regular basis, there is a chance that the phone text message or for that matter phone data is being intercepted.
Battery Rundown – Some spy software running in the background can consume a lot of battery charge. If there is a dramatic change in the battery consumption and the phone now needs charging more often, it might mean that text messages or the phone is being intercepted.
Phone Shuts down – If your phone regularly shuts down by itself, even if the battery is fully charged, there could be one spy application running on the phone.
Increased data usage – If you see a dramatic increase in the consumption of data, it could be due to the spy application running silently in the background. The spy applications constantly send the recorded text message logs and data from the target phone which increases data consumption.
So, these are some signs which could suggest that your text message has been intercepted.
Intercepting text messages is now very easy using a robust application which can intercept any device in some simple steps. Moreover, the application can be used with both iOS and Android devices.
Part 2: Intercepting text messages from both iOS and Android phones
mSpy:
mSpy is a popular application that is compatible with both iPhone and Android. mSpy for the phone has all the features which make this application a unique one to go for. mSpy for phones could give information regarding text messages on the target device and chats. Moreover, mSpy also gives information about call logs and contacts along with access to the IM chats like WhatsApp monitoring, Snapchat monitoring, etc. mSpy also allows you to view the photos and videos taken or stored or just viewed on the target device. mSpy can remotely erase the targeted phone’s data. This feature helps when the phone is stolen. Installing mSpy on the target phone is extremely simple and involves very few steps. So, it takes a few minutes to install the application on the target phone. mSpy works with iPhone as well as Android phones. So, text message interception is possible with both iPhone and Android using mSpy.
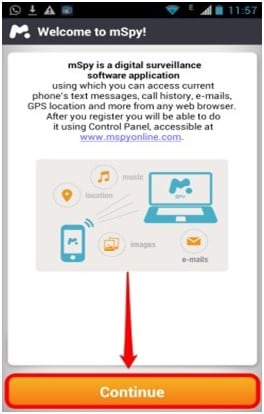
Using mSpy to intercept text messages from other phones
To be able to intercept text messages from other phones, it is first required to install the mSpy application on the target phone that has to be intercepted. Here are some steps to intercept text messages using mSpy from other phones:
1. Install mSpy and set it up
To start the process, buy mSpy that has to be installed on the target device. mSpy requires account creation and activation. This account with login credentials will be later used to monitor all the activities. You will be asked for an email id in which you will receive the setup procedure.
 EmEditor Professional (Lifetime License, non-store app)

2. Install the application
After you have received the installation procedures, install mSpy on the target device which will take a few minutes. Once the application is set up, it is going to work invisibly and the target user will never get to know that he is being monitored. The target phone will work normally and mSpy will not interfere in any of the applications installed on the target phone.
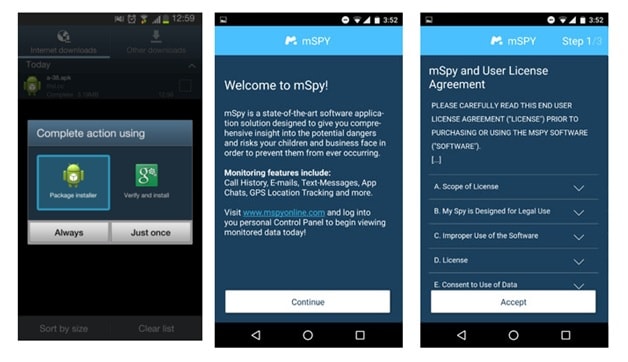
Installing in Android
Installing on iOS
3. Start monitoring
You can now start intercepting the text messages remotely from other phones. Use your account through your login credentials and get reports from the target phone pertaining to text message history, chats, etc.
 With Screensaver Wonder you can easily make a screensaver from your own pictures and video files. Create screensavers for your own computer or create standalone, self-installing screensavers for easy sharing with your friends. Together with its sister product Screensaver Factory, Screensaver Wonder is one of the most popular screensaver software products in the world, helping thousands of users decorate their computer screens quickly and easily.
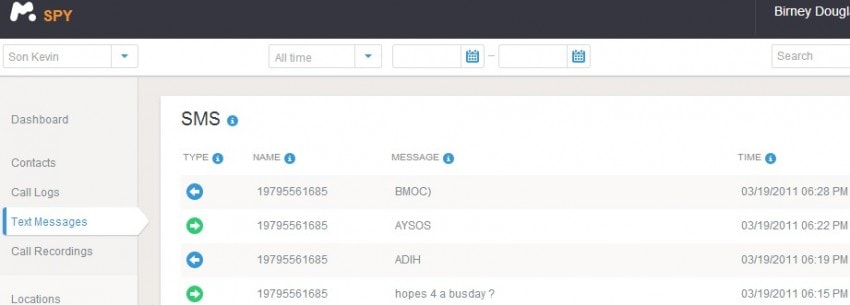
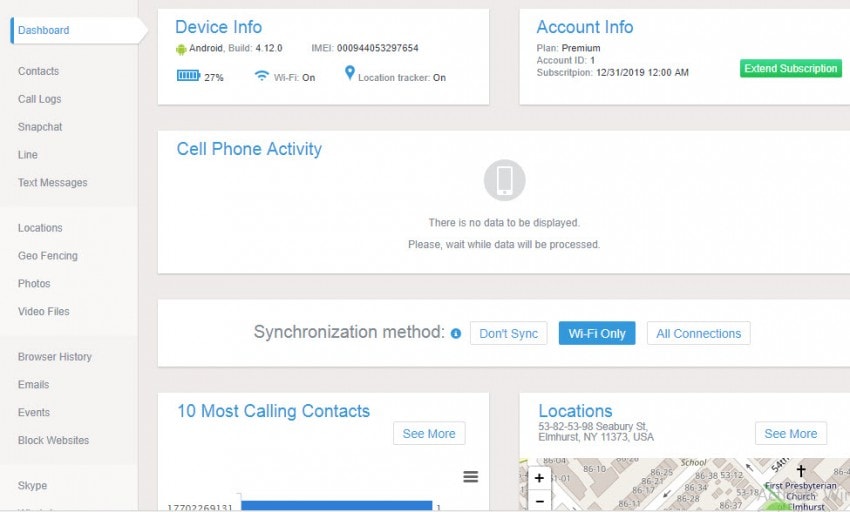
The above screen is the monitoring console through which we can see all the text messages on the target device. The control panel can be opened on any device i.e. phone or computer through the browser using the login credentials.
Part 3: What you need to know when using mSpy
Few things to know when using mSpy :
While the working, installation, and setting up of mSpy is very easy, there are a few things that need to be kept in mind while using mSpy.
1. While it is possible to remotely access data, monitor, and control the target device, it is imperative to have physical access to the target device to install the application, grant permissions, and set the application up. This is a one-time task that needs to be done before you start accessing the target device records remotely from other devices using the browser.
2. If the target device is iPhone or iPad, the target device must be jailbroken for mSpy to be used.
3. The target device must be connected to the internet. mSpy will constantly send information pertaining to text messages or SMS, call logs, WhatsApp messages, etc from the target device to the control panel while it is connected to the internet.
So, these are the ways to install and start intercepting text messages both for iOS and Android using mSpy and we also listed down a few things that have to be kept in mind while going for mSpy. Hope this helps you in successfully and safely intercepting text messages.
5 Ways to Track Vivo X Fold 2 without App
The Find My Vivo X Fold 2 app is a great addition to your iPhone, and as the name suggests helps you to not only track your phone in the event it is stolen, but also lock it so that it cannot be misused. But what if you don’ have the app installed? Does that mean that you have to bid adieu to your iPhone forever? Not really, because we are about to reveal to you 5 different ways to track your iPhone without app, so you can hopefully find your phone in the condition it went astray.
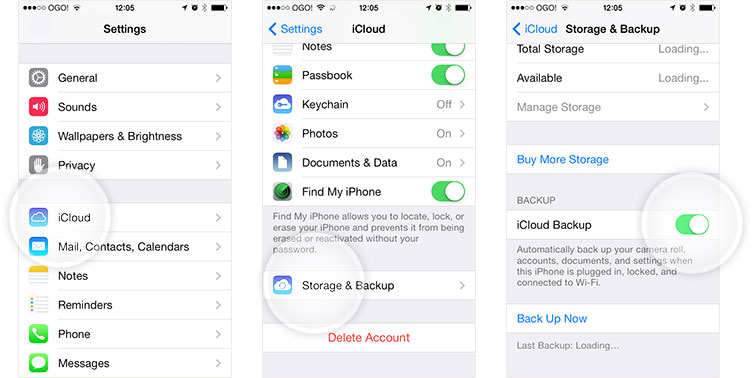
Part 1: Solution 1 – Apple’s iCloud to the rescue
Take note that this solution will not work if you haven’t activated the Find My iPhone service when you set up your device. If you have, here’s how to go about it.
Step 1. Get started by heading over to iCloud, and logging in with your credentials.
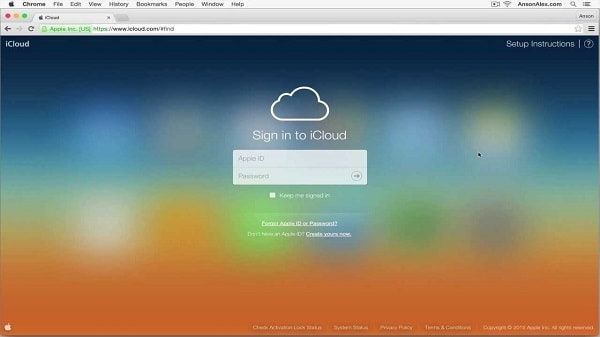
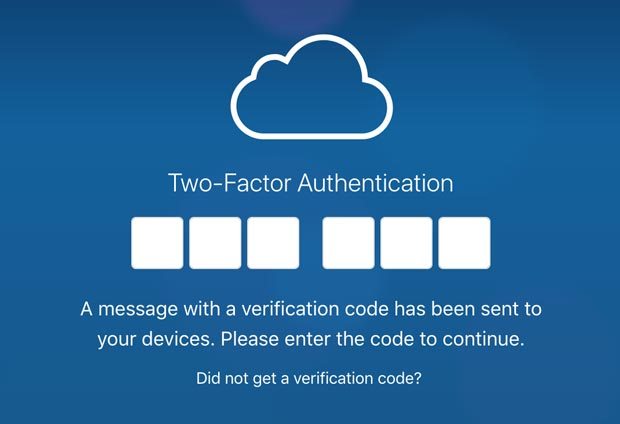
If you are greeted with the two factor authentication process, which asks you to insert a code that was sent to your devices, you can simply skip it by heading to the quick access link at the bottom.

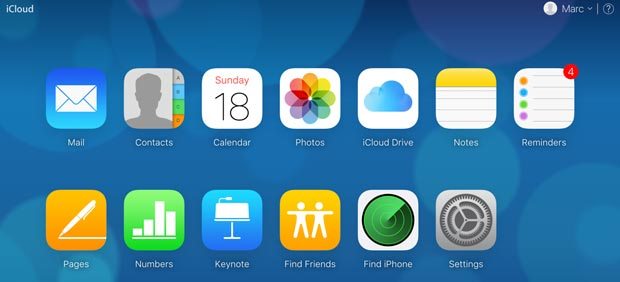
Step 2. From the dashboard, locate the Find iPhone icon on the second row and click on it.
Step 3. Hover over to the All Devices dropdown menu and choose your iPhone.

Step 4. The tracking process will now begin, and you should be able to see it displayed on an interactive map if successful.
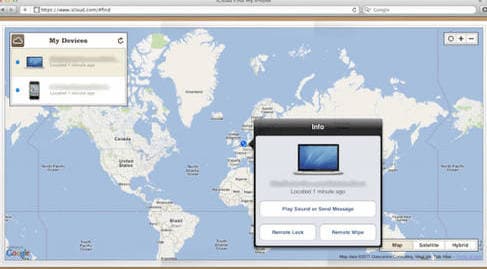
Step 5. Once you know the exact location of your device, you can do one of three things—activate lost mode, trigger an acoustic signal or erase all data.
Part 2: Solution 2 - Google to the Rescue
Note that this solution will only work if you have Location Services enabled on your iPhone.
It’s no surprise that both Apple and the search giant are fond of gathering information on all sorts of things, most notably your location. Google stores this information on its Timeline, so without ado, head to the Google Timeline.

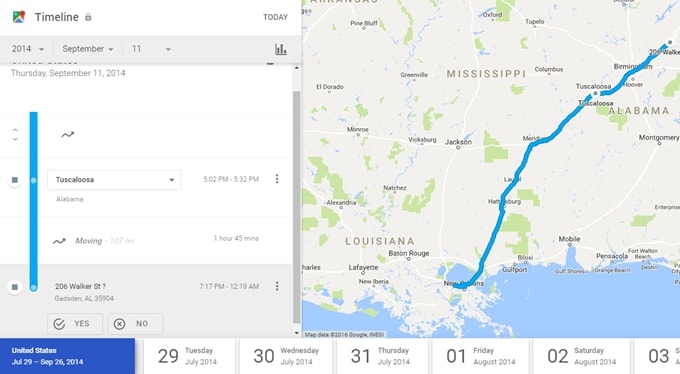
Step 2. Select the present date from the left hand panel.
Step 3. Scroll to the bottom of the timeline, and select the latest location update.
Step 4. If your location is the same as your previous updates, your phone hasn’t moved so you go and get it from that location. Contrarily, if your phone has moved, you should contact authorities, and not go after the thief alone because you never know the type of person they are.

Part 3: Solution 3 - Using Google Photos to Track your iPhone
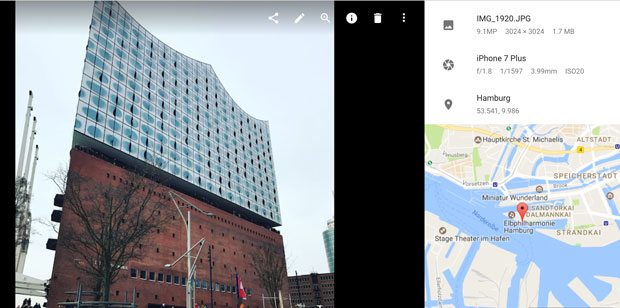
If the above Google features do not work for you, the search giant has one more service that can help aka Google Photos.
This option is somewhat complex, and requires that you have the Google Photos app installed with automatic upload turned on. Further, someone will have to take photos with your iPhone, and in the event it is actually stolen, this is highly unlikely.
Well, if you have the aforementioned prerequisites, head over to photos.google.com to visit your most recently uploaded photos. If you happen to notice any recent photos, click on them and check their location by clicking on the right sidebar. Again, if you do find the location using this method, it is best to contact your local authorities.

Key features:
• Import from any devices and cams, including GoPro and drones. All formats supported. Сurrently the only free video editor that allows users to export in a new H265/HEVC codec, something essential for those working with 4K and HD.
• Everything for hassle-free basic editing: cut, crop and merge files, add titles and favorite music
• Visual effects, advanced color correction and trendy Instagram-like filters
• All multimedia processing done from one app: video editing capabilities reinforced by a video converter, a screen capture, a video capture, a disc burner and a YouTube uploader
• Non-linear editing: edit several files with simultaneously
• Easy export to social networks: special profiles for YouTube, Facebook, Vimeo, Twitter and Instagram
• High quality export – no conversion quality loss, double export speed even of HD files due to hardware acceleration
• Stabilization tool will turn shaky or jittery footage into a more stable video automatically.
• Essential toolset for professional video editing: blending modes, Mask tool, advanced multiple-color Chroma Key
Part 4: Solution 4. Have another iPhone? Use it to Track one that’s gone missing
This method requires that you have Find My Friend enabled on both your missing iPhone and the one you’re going to use to track it. Good news is that starting from iOS 9, this feature is stock and will already be installed on the Vivo X Fold 2 device.
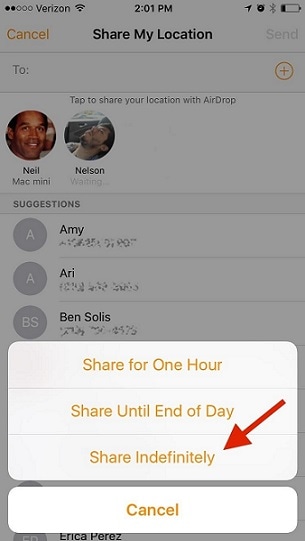
Step 1. Open the Find My Friends app on the iPhone that you will use for the tracking, and then enable Share My Location by tapping on their contact picture located at the bottom.
Ensure that the location is being Shared From This Device as there may be other devices connected with the same iCloud account.
Step 2. Next enable AirDrop from the control center of your iPhone and make yourself discoverable to everyone. Further hit Add on the tracking iPhone, choose your contact icon and select Share Indefinitely.
Step 3. Once the tracking iPhone’s location is shared with your device, a popup will appear asking you how long you would like to share your location for, which is where you select Share Indefinitely.
Step 4. When you’re ready to begin tracking, open up the Find My Friends app, click on their contact (your contact in this case) to see its exact location in real time.
Part 5: Solution 5. Using mSpy to track an iPhone
One of the biggest reasons of using mSpy is that you can do much more than just track your iPhone. With 25 features on tap, mSpy is geared towards keeping track of your iPhone as well as those using it. This remotely managed software is compatible with iOS, Windows and Mac OS, and can be easily accessed from any browser.

It is designed for both home and commercial use, so whether you’d like to keep track of your kid’s text messages employee emails, mSpy can truly be your best friend. Things you can keep tabs on include instant messages such as from WhatsApp, emails, multimedia messages, incoming and outgoing calls and GPS locations.
Speaking of GPS locations, here’s how to get started with tracking your iPhone using mSpy.
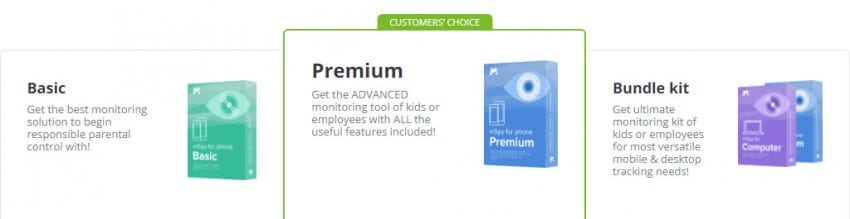
Step 1. You first need to choose between one of three plans, and your login credentials will be emailed to you upon successful completion of purchase.
Step 2. Next open the confirmation email from your computer and click the link to go to the mSpy control panel aka dashboard.
Step 3. Simply follow the onscreen instructions to install mSpy on the Vivo X Fold 2 device you wish to monitor.
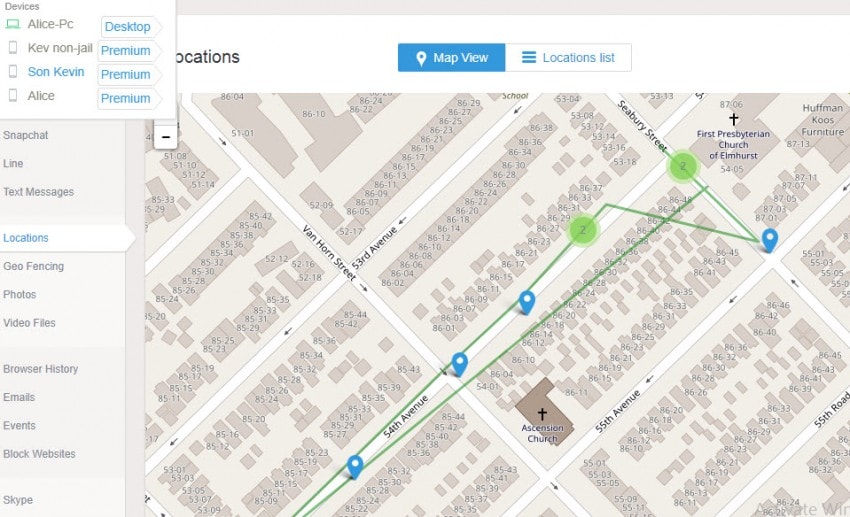
Step 4. The interface is highly intuitive, so all the information you need is featured on as single screen. To track your iPhone using mSpy, simply open up the dashboard, click on the top left hand corner to select the Vivo X Fold 2 device you’d like information on and then click on locations tab to view its exact whereabouts in real time.
There you go! Lost your iPhone? We’ve provided you with 5 different ways to locate it, and we hope that one of them could help you recover your device.
- Title: How to Check Distance and Radius on Google Maps For your Vivo X Fold 2 | Dr.fone
- Author: Marray
- Created at : 2024-07-21 21:57:06
- Updated at : 2024-07-22 21:57:06
- Link: https://android-location-track.techidaily.com/how-to-check-distance-and-radius-on-google-maps-for-your-vivo-x-fold-2-drfone-by-drfone-virtual-android/
- License: This work is licensed under CC BY-NC-SA 4.0.